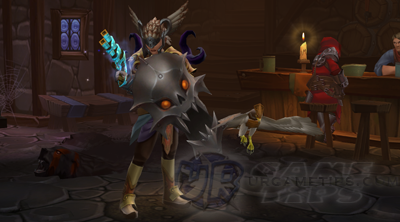
Torchlight II: Outlander – Poison Glaive Caster Stats and Skill Build
This build will focus on using Poison based or Elemental skills in the Outlander skill trees. To enhance their elemental damages and to level up easier, this build will prioritize the Focus attribute more than Dexterity. If you want your Outlander to spam powerful skills with massive damages to your enemies, or kill Champions or Elite bosses within 60 seconds or less, then this build is for you!
◄Back to Torchlight II FAQ, Tips, Tricks and Strategy Guides List
– Character Attributes and Equipment Stats –
Outlander’s Charge Bar – You will get increased Cast Speed, Dodge Chance, Critical Hit Chance and Attack Speed, based on the current amount of charge you have.
Base Attributes at Level 100 (Bonuses are not included)
– Strength: 10 – Dexterity: 110 = +20% Critical and Dodge Chance – Focus: 410 = +205% Magic Damage – Vitality: 5
Stats Allocation
– (Dexterity: 1 and Focus: 4) until Dexterity hits 110. – Next, put all Attribute Points to Focus till Level 100.
Main Equipment Stats (Enchants, Socketables and Stat Bonuses to Find)
If you are not playing Elite, focus on your Health and damage output. – +? Health – +? Focus Attribute Bonus – ?.? Mana recovery per second (void embers or similar are good for early to mid game) – All damage taken is reduced by ?% – +?% bonus to Critical Damage
Additional Equipment Stats
– Physical/Elemental Armors – ?% chance to reflect missiles at ?% weapon DPS – +?% to all Damage – +?% to Poison Damage (Note: A +10% Poison Damage is equal to 20 Focus) – +?% Cast Speed – +?% Critical Hit Chance – +? Mana – ? Mana stolen on hit (good for early game)
______________________________________________________________________
– Weapons, Armors and Socketable Items –
Note: I will not mention all specific items to get, to let you enjoy the game. The game is very beatable even if you are only using some alternatives to those “Best” items per slot. Hunt monsters, open chests or gamble to get the items that you need. Good Luck!
1-Hand Range Weapons (Primary Weapon Set “I”)
– Any Pistol or Wand that you like. Preferably with good stats (equipment stats above). – You have high Focus allocation, thus giving you an advantage to equip better Wands that are way above your current level. Use them early game until later levels. – At higher levels, you shouldn’t be doing auto/normal attacks anymore.
Shields (Primary Weapon Set “I”)
– Preferably with high ?% chance to Block or ?% chance to reflect missiles.
– The Lvl 23 “Roundhaven” Shield has 29% chance to Block.
– The Lvl 98 “Parma’s Coal-Burner” Shield has 45% chance to Block! – Note: Get some Vitality from equipments or enchants to get Block to 70~75%.)
Range Weapons (Secondary Weapon Set “II”)
– If you are using a Pistol as a primary weapon, then ignore this section. – In case that you are using a Wand as a primary weapon, switch to your secondary weapon set (“W”) to be able to use the Venomous Hail skill. – Equip a 1-Hand or 2 Handed range weapon except Wands, Staves or Cannons.
All 10 Armors/Trinkets
– Refer to the Main or Additional Equipment Stats above for more stats to find. – At early game, find items that will increase your Mana/Mana Regen and Health.
Notable Armor Sets
– Lvl 96 “Valkyrie” Set: Collect 4 pieces to get the first 4 bonuses. – Note: Blue/Rare Items will generate random stats and number of sockets. Collect the good ones only, with at least 1 slot!
– Lvl 70 “Lore” Set: “Pendant of Rejected Realities” and 2 “Ring of the Players“.
– Lvl 99 “Unearthly” Set: Recommended for non-Elite Mode. The Boots looks good for this build though.
Notable Socketable Items
Save all socketables that are similar to the stat bonuses below. They are also good. – This socketables will be your main priority items to get/farm in the game.
– Lvl 90 “Wfuntir Skull“
– +62 Focus Attribute Bonus (Armor/Trinkets)
– Lvl 73 “Skull of Riechliu“
– +1540 Health (Armor/Trinkets)
– Lvl 55 “Skull of Limoany“
– All damage taken is reduced by 5% (Armor/Trinkets)
– Lvl 99 “Zardon’s Might Skull“
– 25% chance to reflect missiles at 50% weapon DPS (Armor/Trinkets)
– Lvl 75 “Rambren Skull“
– +60% bonus to Critical Damage (Weapon)
Equippable Spells/Tomes (Hero)
Note: Higher Rank/Level gives better output and duration. – Spell: Dervish or Elemental Overload – Tome: Blocking – Tome: Concentration – Spell: Haste or Any Spell/Tome that you like
Equippable Spells/Tomes (Pet)
– Spell: Heal All – Spell: Silence – Any Summons or Spells/Tomes that you like.
______________________________________________________________________
– Poison Glaive Caster – Main Skill Build –
There are so many skills that you can choose from but it is best to choose or prioritize what you really need for your build. Other unmentioned skills below are also good but they are much more suitable for other Outlander builds. Feel free to use other skills that you think is best. – You might also need to repeat completed maps to level up and learn more skills before
taking on bosses. To learn an effective way, click here.


 Glaive Throw (Active) – Get 5/15 – This poison based skill will serve as your first area of effect and 1 on 1 skill. – Good accuracy, rebound range and bonus effects!. Also generates Charge. – Leave it to level 5 and spam this skill until you max Shattering Glaive. – At higher levels, if your Mana can spam this, set it as your left mouse click skill.
Dodge Mastery (Passive) – Get 15/15
– To increase Dodge Chance and survivability.
Master of the Elements (Passive) – Get 15/15
– To increase Elemental damages like Poison and Fire.
Rune Vault (Active) – Get 1/15
– At first, this skill was really complicated to use because you have to move your mouse pointer opposite to where you want to land, unlike the other classes’ escape mechanisms. – With some practice, this skill is actually quite good!, you can hold your auto attack/skill on a single melee enemy (1 on 1) then use this skill to go around it, right before they land their attack. – For range enemies, land to your right or left when facing them to avoid direct attacks. – The blind effect looks good too!, and you can press and hold this skill to go further. – A little tricky to use on tight places but very useful on wide open spaces. – I recommend the Haste spell for travelling maps though.
Share the Wealth (Passive) – Get 15/15
– Share a percentage of your current Charge bar’s bonuses to allies including yourself!
Cursed Daggers (Active) – Get 15/15
– Your main debuff skill. Cast this first to sink in the Poison DoT and Damage Reduction. – Nice range and bonuses. Max it!
Repulsion Hex (Active) – Get 10/15
– If you are looking for a skill that can help you repel enemies around you, this skill is adequately enough and it has a very good cooldown/duration. – Get the tier 2 bonus for better duration, interrupt and chance to flee.
Stone Pact (Active) – Get 15/15
– Stay inside it’s radius to get constant heal and bonuses. – Note: damage reflect will not work if you dodged an attack, so to utilize the reflect bonus, cast this skill where your attacking pet or summons are instead. – This skill can be used more than once, so just cast it around the battlefield.
Shattering Glaive (Active) – Get 15/15
– This skill will become much more powerful once you get it to Rank 15/15 because of the added Fire Damage (non-DPS based). A great late game skill that can kill bosses in seconds! – Use this as your main boss or mob destroyer. If enemies are too scattered, use Glaive Throw instead. Put points here if you can’t find any main skill to upgarde. Max it at higher levels.
Venomous Hail (Active) – Get 15/15
– Mainly used for sniping enemies around the map and for generating Charge (the Bramble Wall and Glaive Sweep’s Charge combo is not included here). – Also a good debuff skill that inflicts Poison effect for up to 5 seconds, reducing their armor and damages by 33%. – Note: You must use a bow, crossbow, shotgonne or pistol to use this skill. Refer to the weapons section above for more info.
______________________________________________________________________
– Optional Skills for Unused Skill Points –
– Total Skill Points Used: 121
– Total Unused Skill Points: 11 – If you have extra skill points, either upgrade the skills you currently have or save them for later use (after reaching the next required Lvl of skills). You can also invest them to other skills that you like but use the unused skill points above as your limit.
Poison Burst (Passive)
– A nice passive skill once you get Venomous Hail. Note: Venomous Hail is the only skill that can proc this (for this build).
Bramble Wall (Active) and Glaive Sweep (Active)
– Put 1 point each. Summon the wall then hit them with Glaive Sweep to get full Charge!
______________________________________________________________________
Note: You might need to update your Torchlight 2 to it’s latest version or patch to enjoy this
guide. Some skill description and game features are different compared to the original version. If you like this PC game, please support the software developers by purchasing the game!
______________________________________________________________________
Related Torchlight II Tips & Guides:
Torchlight II: Tips, Tricks, Game Help and Info
Torchlight II: Outlander – Blind-Lock Summoner Stats and Skill Build or
– CLICK HERE TO BROWSE MORE TORCHLIGHT II TIPS & GUIDES –